Appointment Slots allow you to list available dates and times on a public calendar, so that current and prospective clients can request a scheduled session, if the provider has the feature enabled. For a good overview of this feature, please see the video recording of a webinar we hosted on this type of virtual clinic.
If you are an Account Administrator, you can request that this feature be added to your account by contacting [email protected]. Please include the name of the Account Service(s) that users can request an appointment for. If you have not yet created one, please include the information we will need to create one for you: name, description, payment required (if applicable), and scheduling duration.)
This support article will go over the process for accepting or declining a request once one has been made to you.
You may also be interested in:
How to accept/decline a request sent to yourself
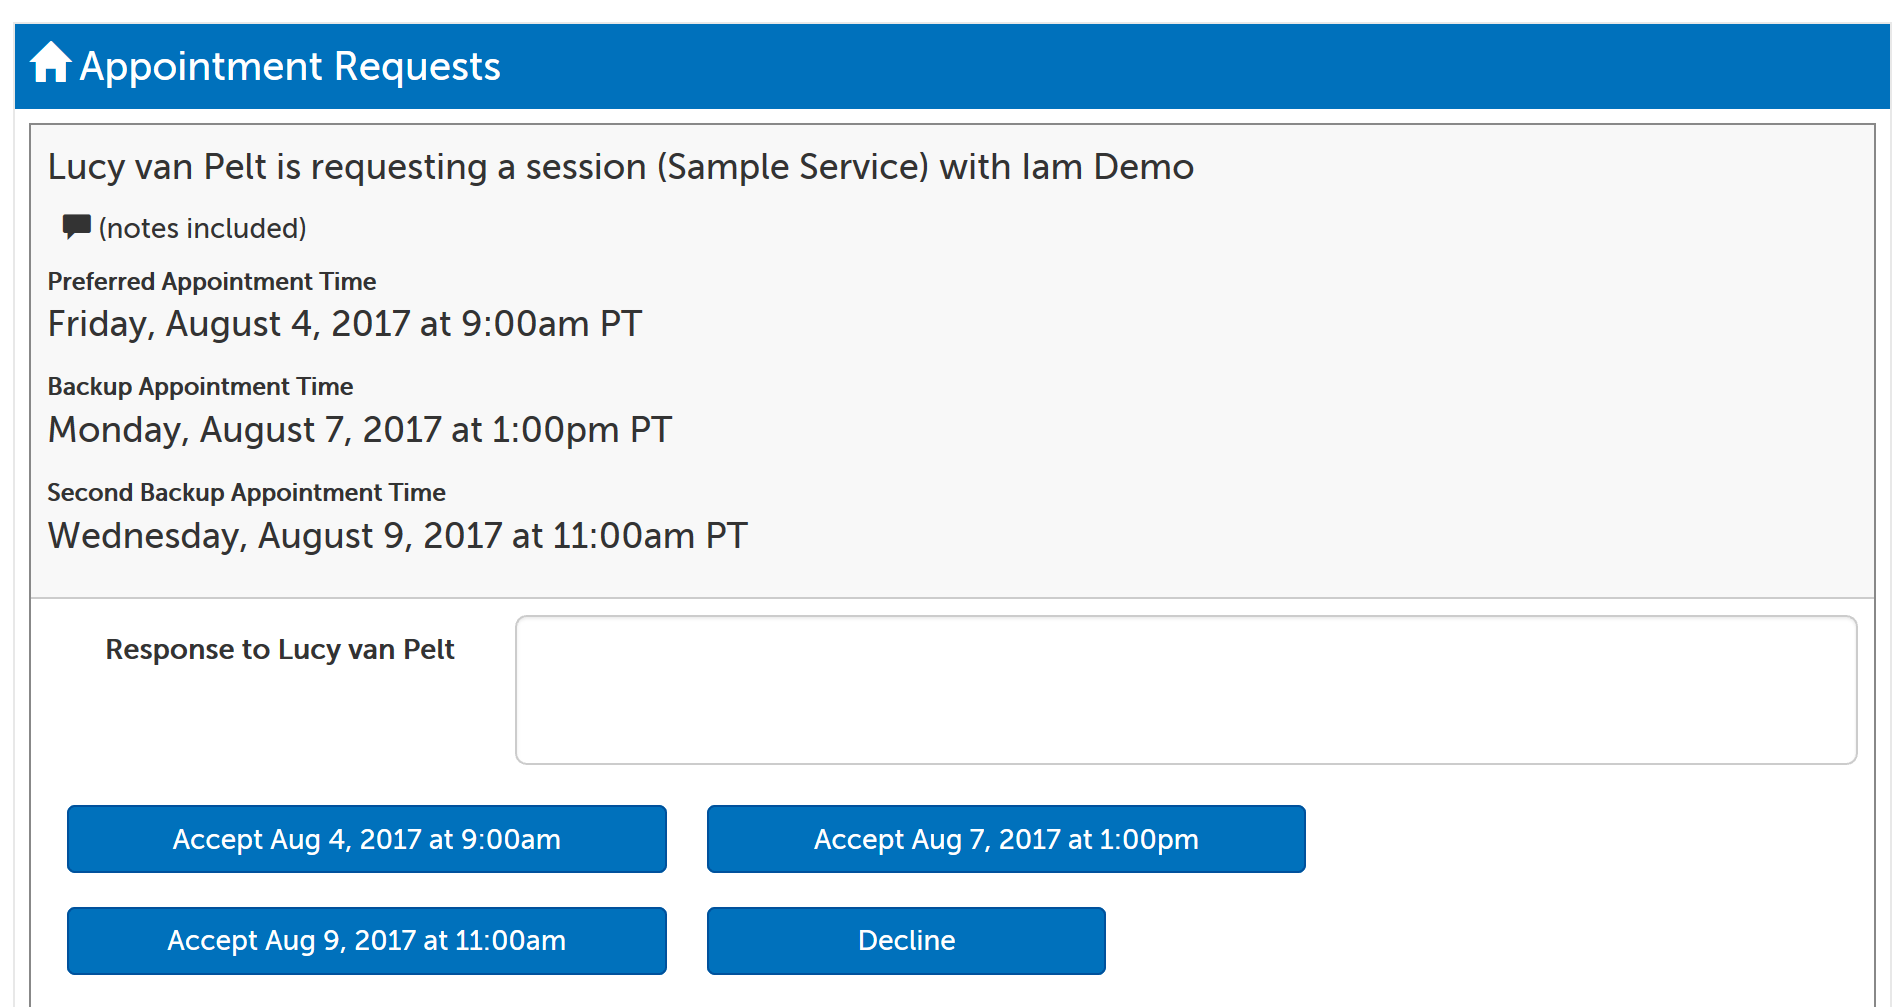
1. When a session request has been made to you, you will receive an email notification with the subject "Video Session Request". It will mention the service name that is being requested.
2. Log into your account. You should automatically land on your Dashboard, and view the request from there.
- Click one of the "Accept" buttons to accept the request and create the session. An email invitation will automatically be sent to the requester.
- Click the "Decline" button to decline the request.
- For either choice, you can type in notes to be sent to the requester's account.
How to accept/decline a request on behalf of a host
1. When a session request has been made to a host that you are a scheduler for, you will receive an email notification with the subject "Video Session Request". It will mention the service name that is being requested.
2. Log into your account.
3. Click on the "Scheduling" tab at the top and select "Requests".
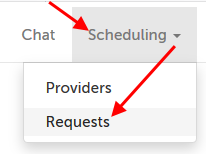
4. If there are multiple pending requests, they are ordered from oldest to newest.
- If you are a scheduler for multiple virtual clinics, you can use the "Filter" button in the upper right hand corner to show only requests from particular clinics.
Click on the "Assign" button for the request you want to accept or decline.
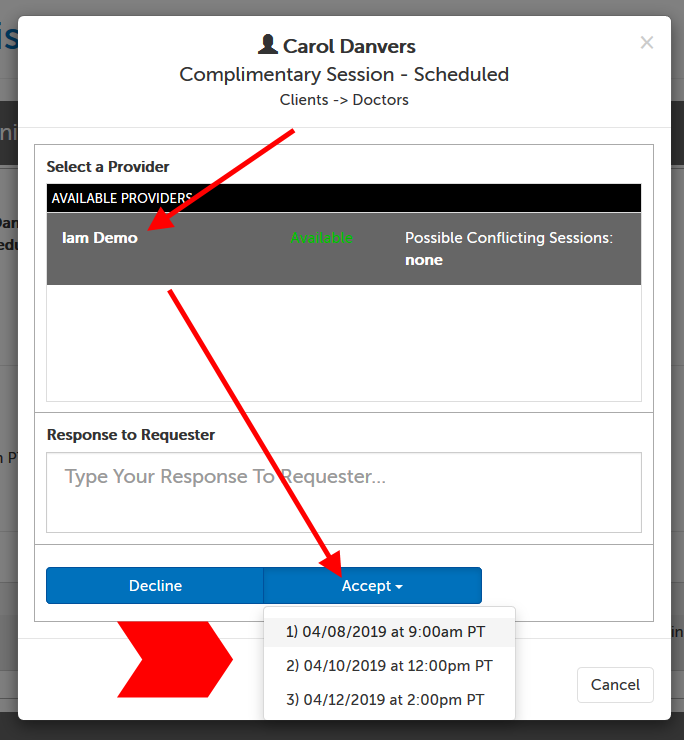
5. A popup will appear with a list of providers for that clinic. Select the name of the provider that you want to accept the request for, and then click the "Accept" button and choose ONE of the requested dates/times. (If declining, just click the "Decline" button.)
- The "Available"/"Not Available" status is determined one of two ways, depending on the set up of the virtual clinic.
- On-demand: a toggle on their website
- Calendar: availability as entered in their account's appointment slots.
- Possible Conflicting Sessions: if the host has any sessions scheduled within 2 hours of one of the requested time slots, those scheduled times appear here.
- Response to Requester: If you would like to type a message back that will appear on the requester's dashboard, enter the text here BEFORE you click on the Decline or Accept button.
6. If you declined the request, the requester will receive a notification that the request was declined, and be able to see your response (if any) on their own dashboard.
If you accepted the request, the requester will receive an invitation message, and be able to see your response (if any) on their own dashboard, as well as the meeting that was created.
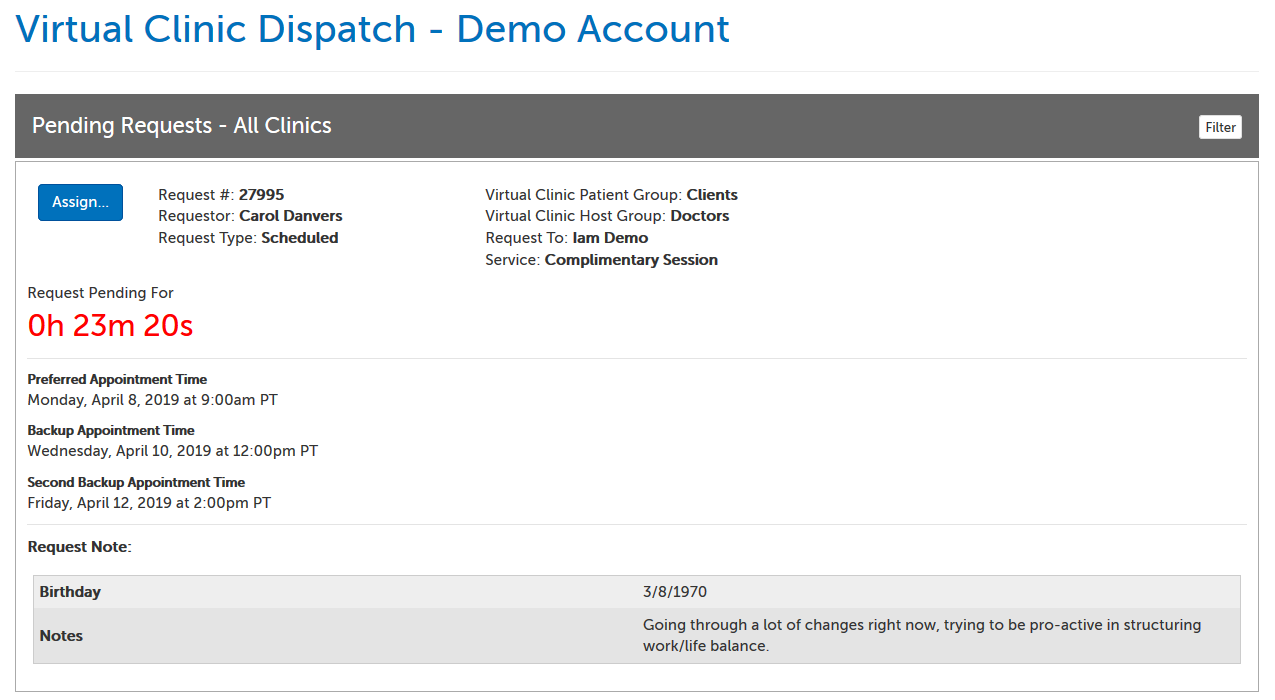
Components of a request on the Dispatch page
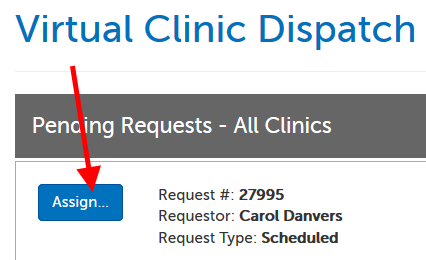
- Request #: Request number
- Requestor: Name of the requester
- Request Type: This is either "Now" (on-demand requests) or "Scheduled" (in which they selected specific dates and times as part of their request)
- Virtual Clinic Patient Group: Name of the group of requesters.
- Virtual Clinic Host Group: Name of the group of accepters.
- Request To: This will either name a specific individual or the name of the group of accepters. (To whom the request is directed.)
- Service: This is the name of the service the requester chose at the time of the request.
- Request Pending For: How long since the submission time. The time counter turns from green to red after 5 minutes have passed.
- Request Time(s): If a Scheduled request (as in the example below), the requested dates/times. If a Now request, the time stamp of when the request was made.
- Request Note: Any notes from the pre-request form. (This is customizable per virtual clinic. An account administrator can request changes by emailing [email protected] )
This article was last reviewed by our Support team on April 5, 2019.